Beginning: Confidently Unlock Your Dream Space
Imagine being in an empty lot or strolling through an open house and knowing exactly how every window, door, and square foot would work. That confidence comes from one important skill: being able to read a floor plan.
Many people see plans as a bizarre jumble of lines, figures, and shapes that don’t make sense. But those lines are the exact words of architecture. They are the most important guide to the future of your home.
This floor plans primer for beginners is meant to make that language easier to understand. We’re going to go over a U.S. residential floor plan, piece by piece, so you can picture and understand your space before you even start hammering nails. It’s not as hard as you think; let’s get started and find out!
The Base: Orientation and Size
Before you look at a single room, you need to know two important things that are normally in the bottom corner of the title block: the scale and the orientation.
Understanding the Architectural Scale
A floor plan is a smaller version of what is real. You need the scale to figure out how big the rooms really are and how well the furniture fits.
The Imperial system is usually used for home layouts in the U.S. You will typically see the scale stated as 1/4″ = 1′ (one-quarter inch is equivalent to one foot). This means that every quarter-inch you measure on the paper is equal to one foot of space in the house.
Other typical scales are 1/8″ = 1′ or 1/2″ = 1′. Always check this first! The key to turning the drawing into real space is knowing the architectural scale.
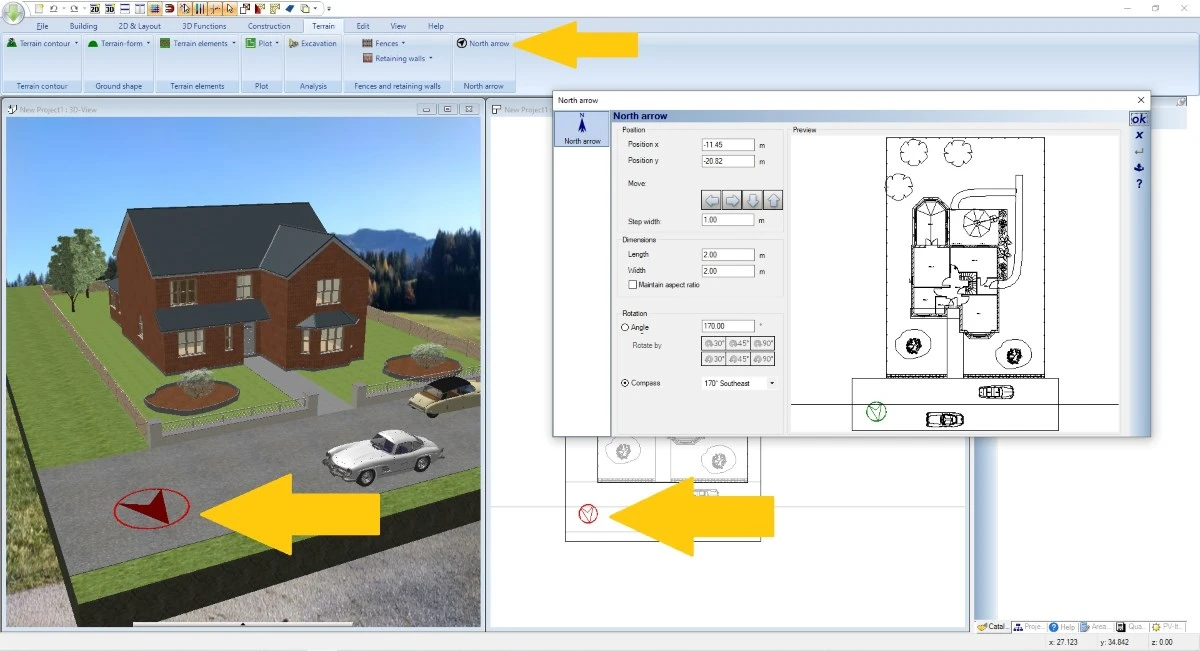
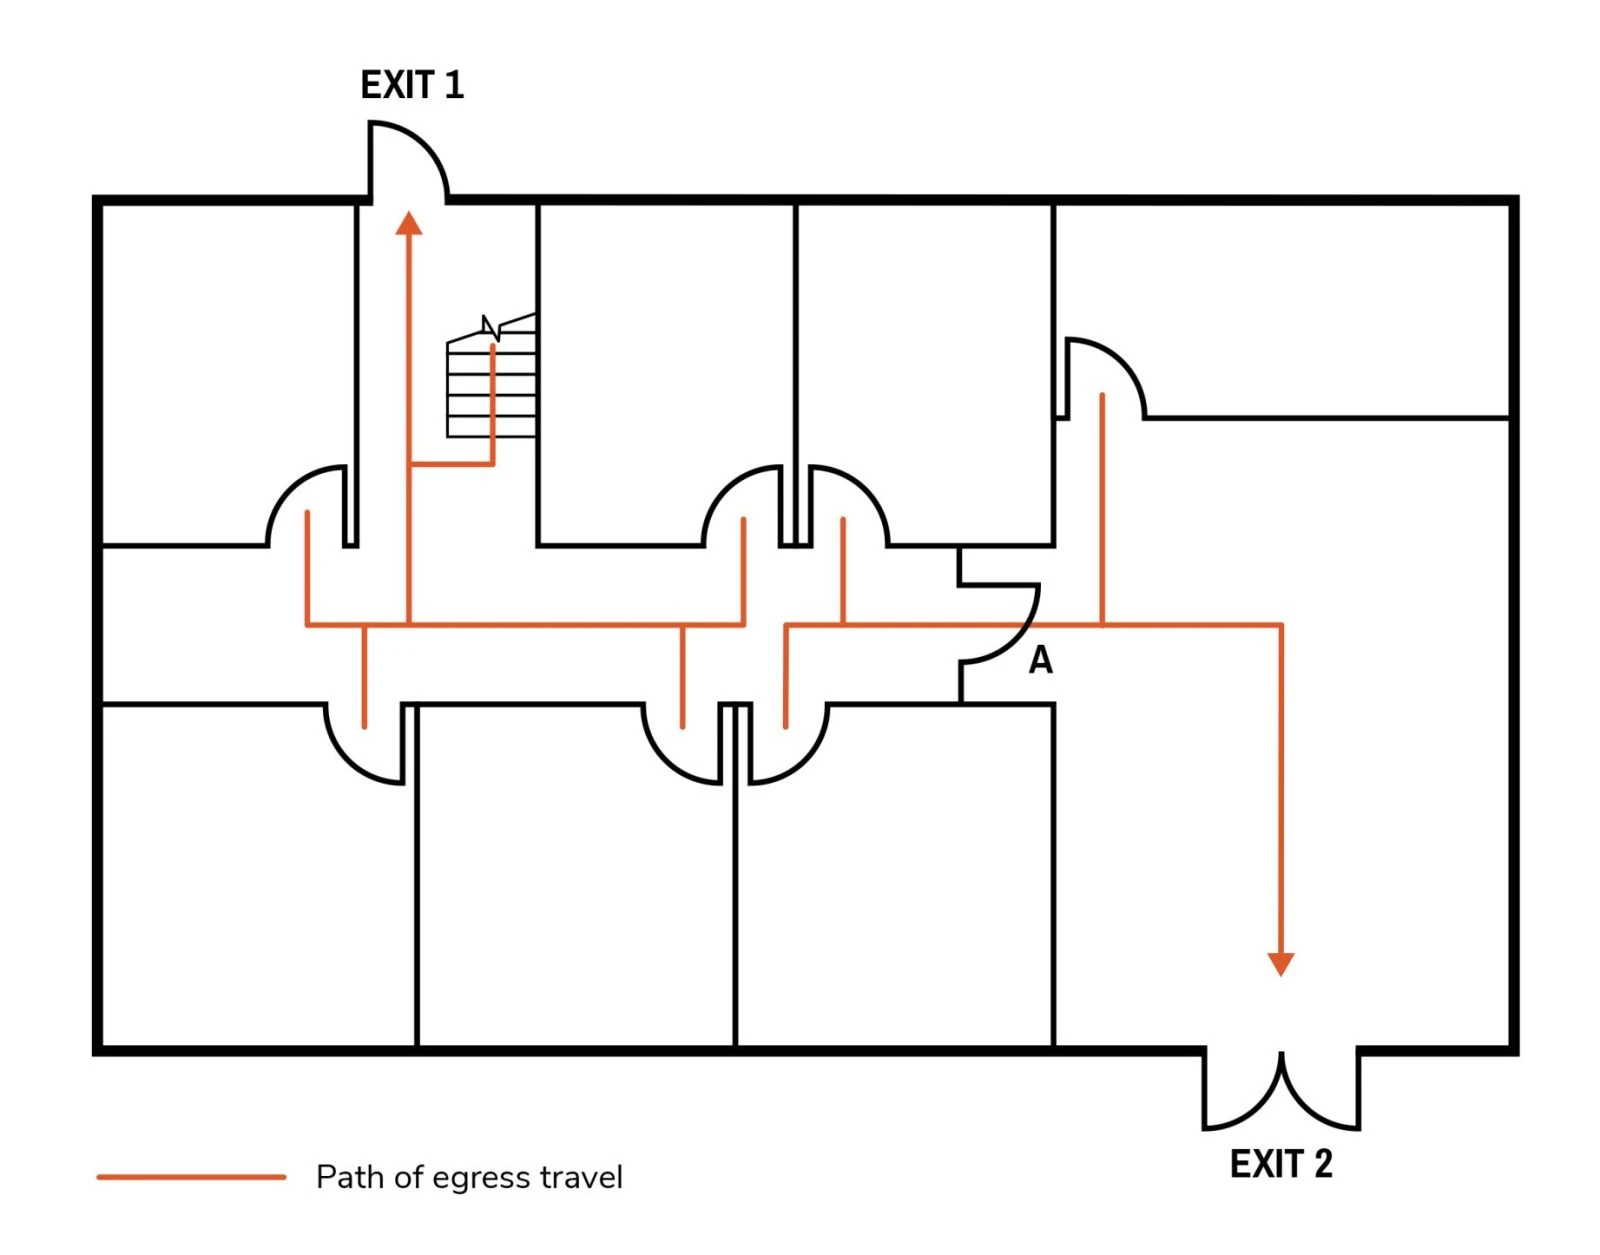
Use the North Arrow to Find Your Way
Look for a little sign that says “N” (the North Arrow) and has an arrow pointing up.
This is really important for getting the most out of natural light and saving electricity. ones that face east get magnificent morning sun, whereas ones that face west get hot afternoon sun. The North Arrow helps you figure out how much sunlight the house gets and where your sunny breakfast nook or cool, shady bedroom will be.
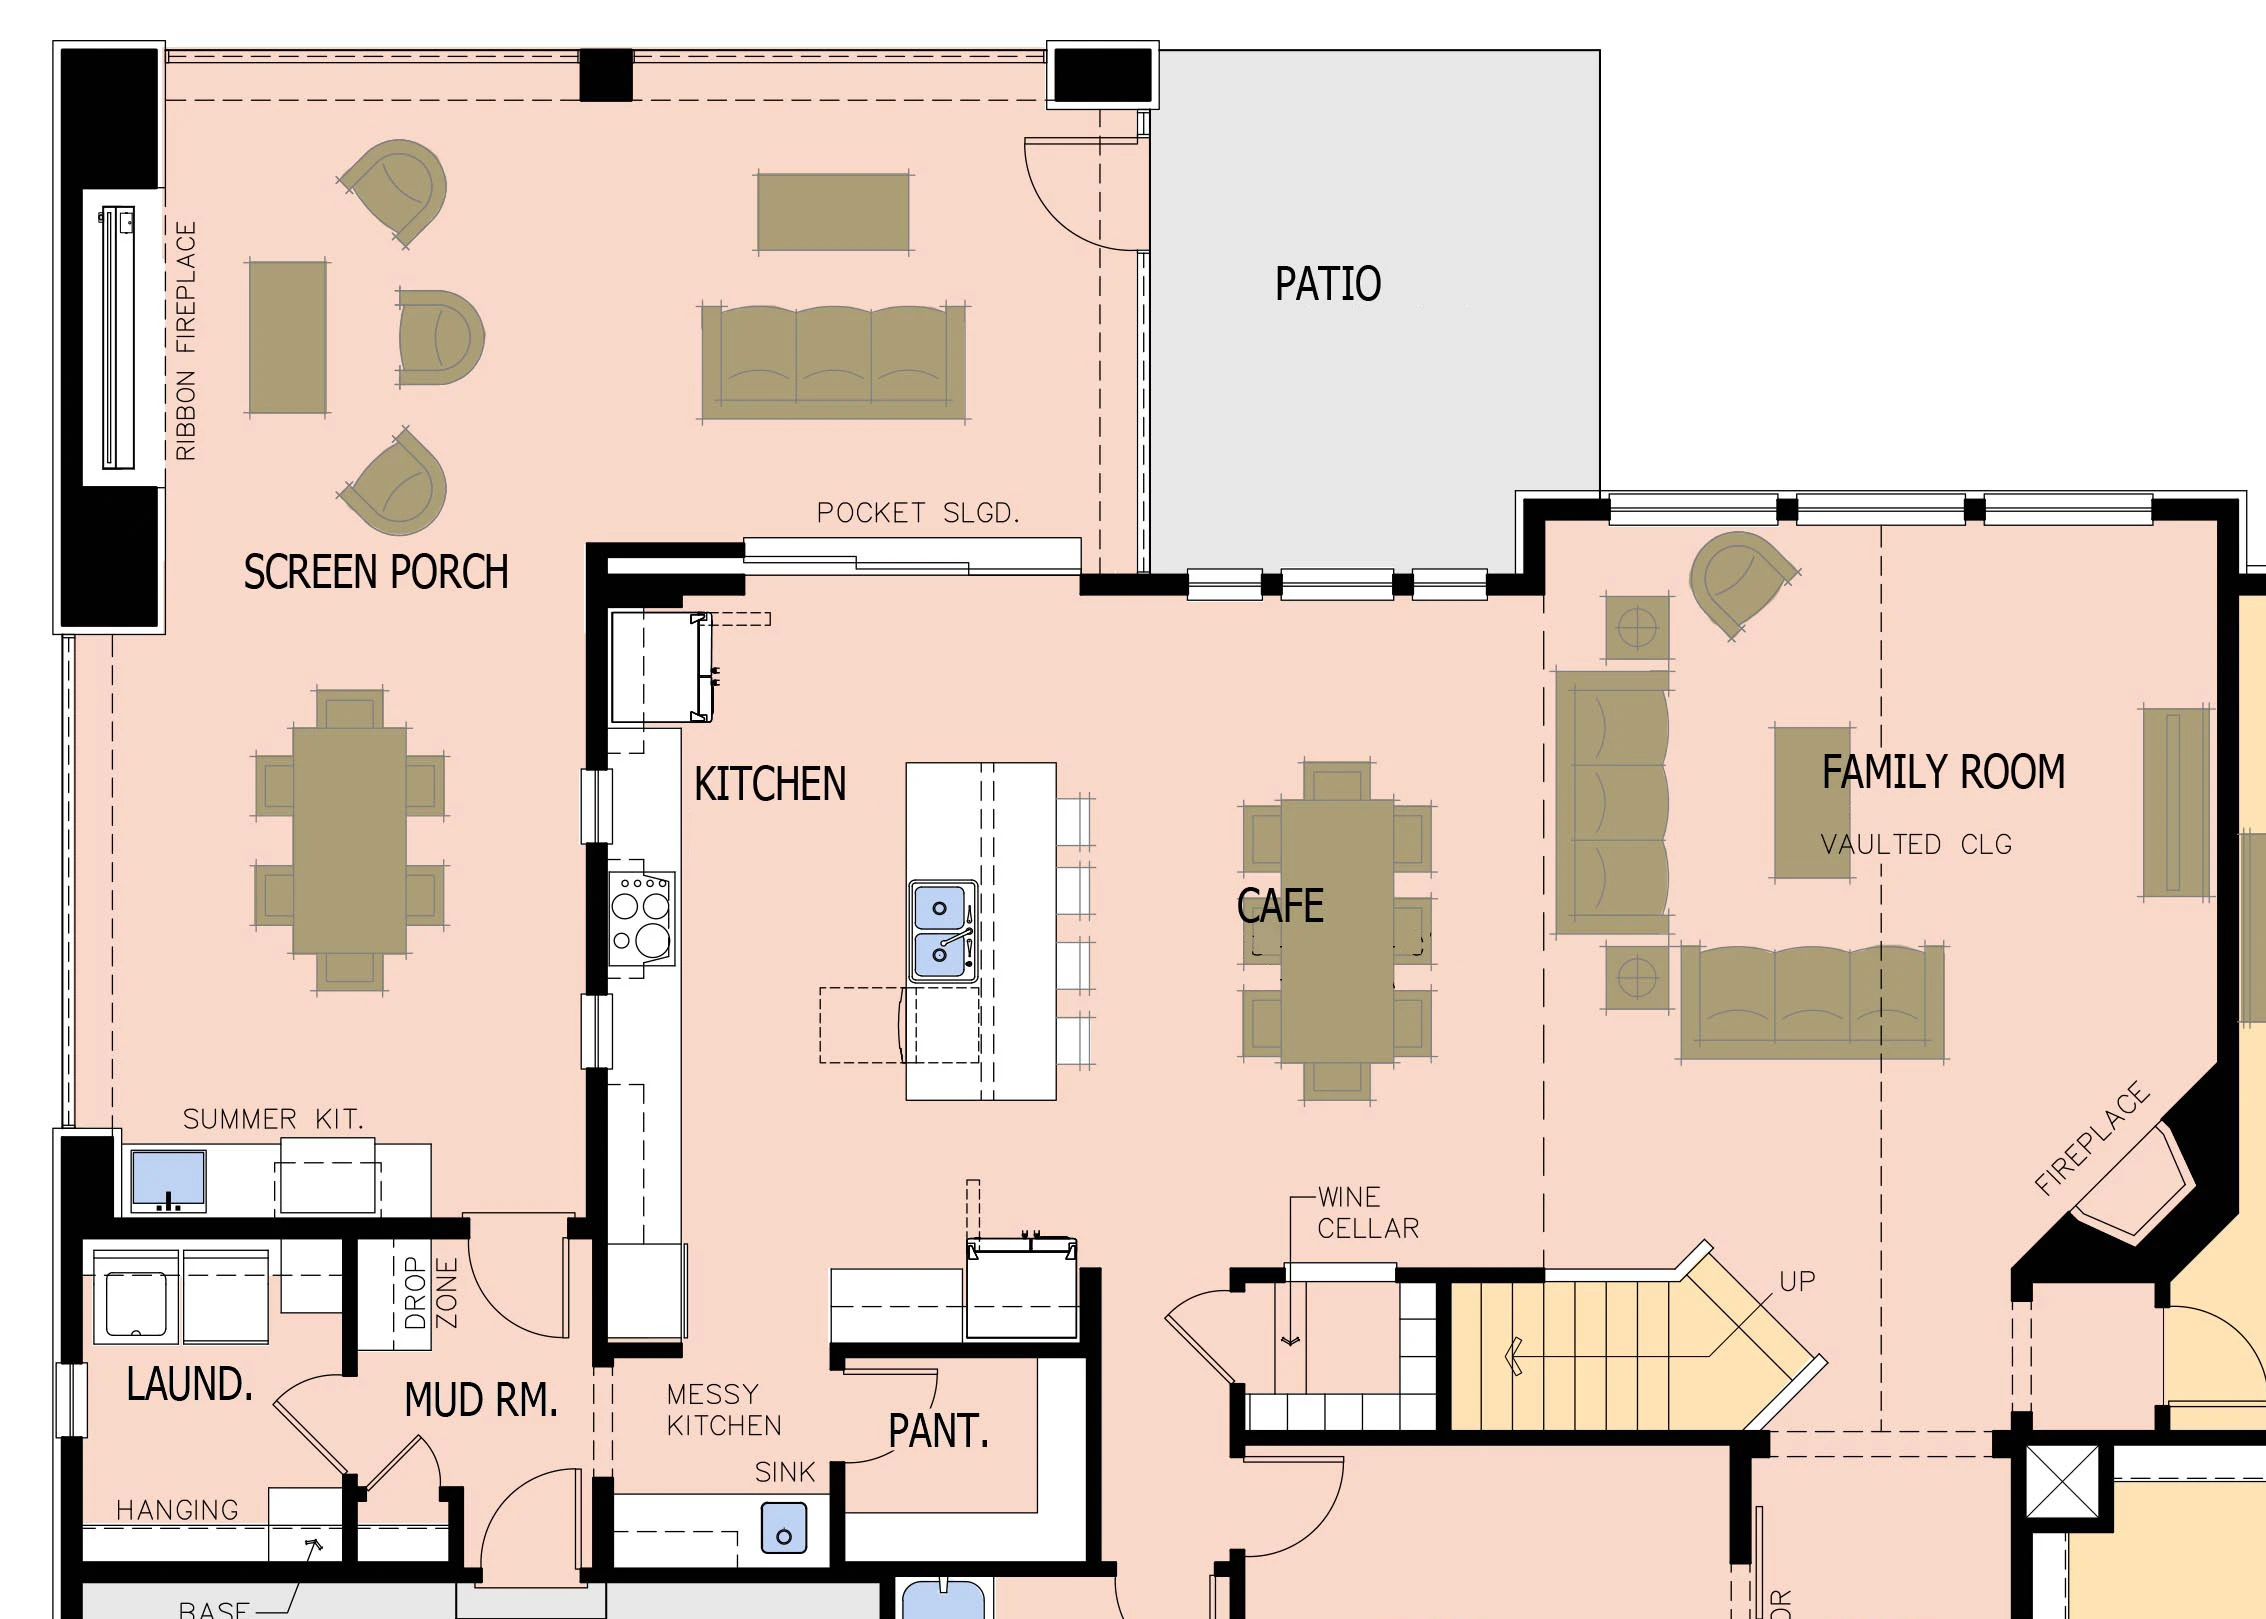
The Structure: Walls, Size, and Flow
The next stage in learning how to interpret floor plans is to look at the building’s shell and how you move around inside it.
Finding Out What Kind of Wall It Is
Not all lines are the same. The lines that show walls are very important:
- Exterior walls are usually drawn with larger, darker lines or a solid hatch pattern. They are the structural limits that hold the weight.
- Interior walls are drawn with narrower lines. They split the room, but most of the time they don’t hold any weight.
If you observe dashed lines going through a room, they could mean that there are beams above or that the ceiling height changes. Always look at the notes that come with it.
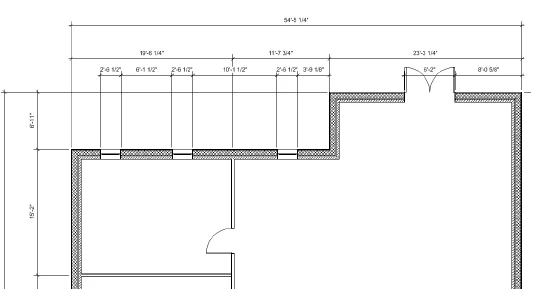
How to Read the Room Dimensions
The dimension lines are the most essential numbers on the blueprint. These are thin lines with arrows or check marks at the ends that show the exact distance between two places, such the length of a wall or the width of a door.
Most of the time, the sizes of the rooms are written right in the middle of the space (for example, 14′-6″ x 12′-0″). These figures stand for feet and inches in U.S. plans. Unless otherwise stated, always assume that the first number is the horizontal dimension (side-to-side) and the second number is the vertical dimension (top-to-bottom). This is the key to making sure your King-sized bed fits!
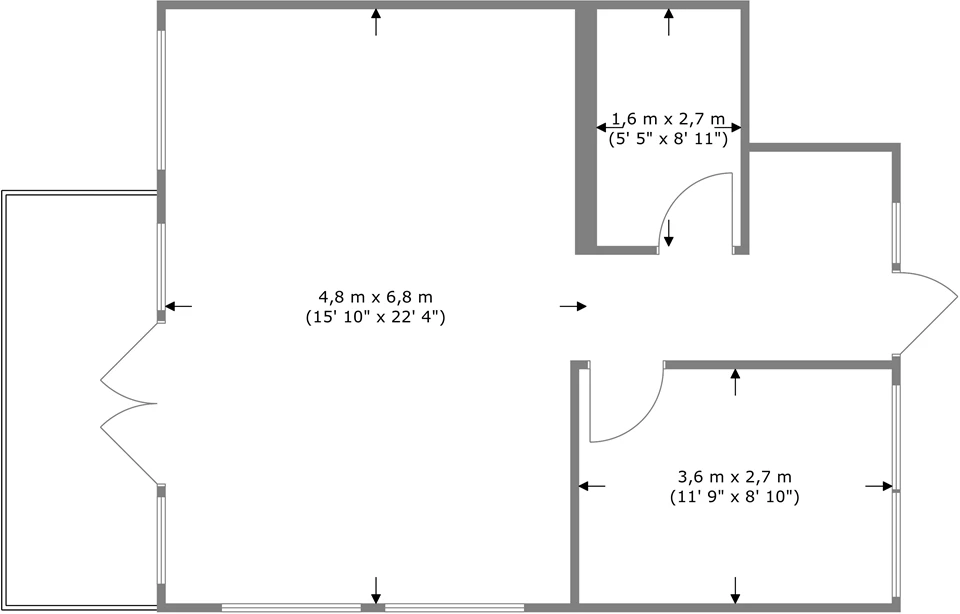
How Important Door Swings Are
A gap in the wall and a thin, curving line called the arc show where the door is. This arc is one of the most important pieces of information on the whole design.
The arc illustrates which way the door swings and how much space it needs on the floor while it’s open. For instance, a door that swings into a short hallway can immediately block circulation. You may better plan where to put furniture and avoid obstructing entry points by picturing the swing.
Figuring Out the Language of Blueprints
A standard set of symbols is used in floor designs to show everything from plumbing facilities to electrical outlets. You really learn how to use your home’s layout when you understand these precise floor plan symbols.
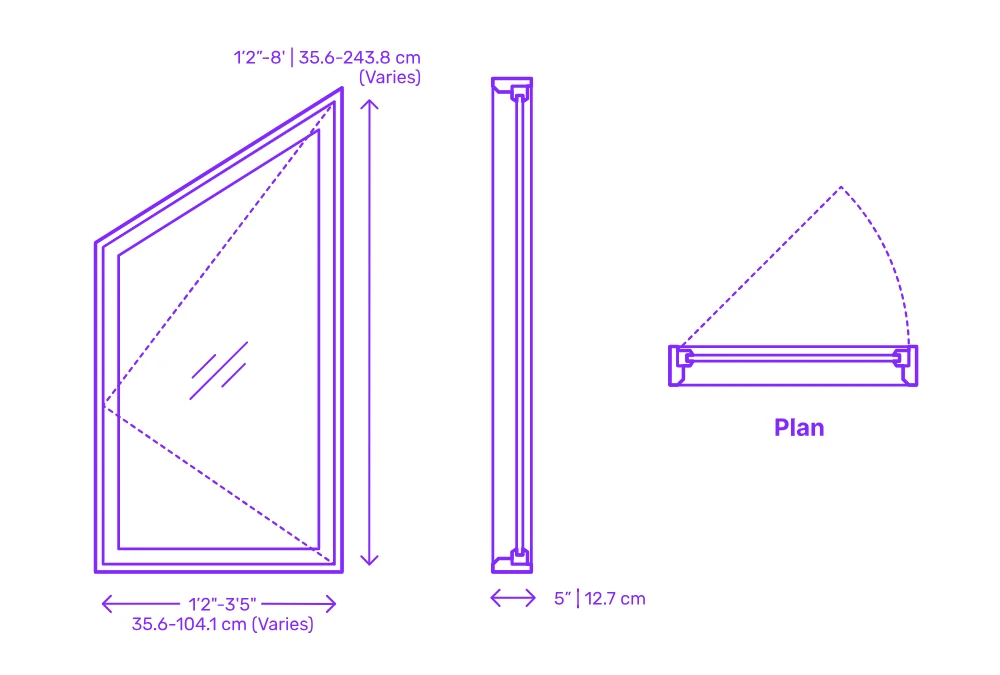
Windows and Light from the Outside
Windows look like gaps in the wall, and they are usually shown by two or three thin lines that are parallel to one other. The lines in the break frequently show what kind of window it is:
- Fixed Window: A plain rectangle with one line going through the middle.
- Sliding Window: Usually has two or three lines that run parallel to each other.
- Casement Window: There may be a little arc, like on a door, to denote which way the window opens.
It’s important to know these things so you can plan where to put your drapes, shades, and that perfect reading chair.
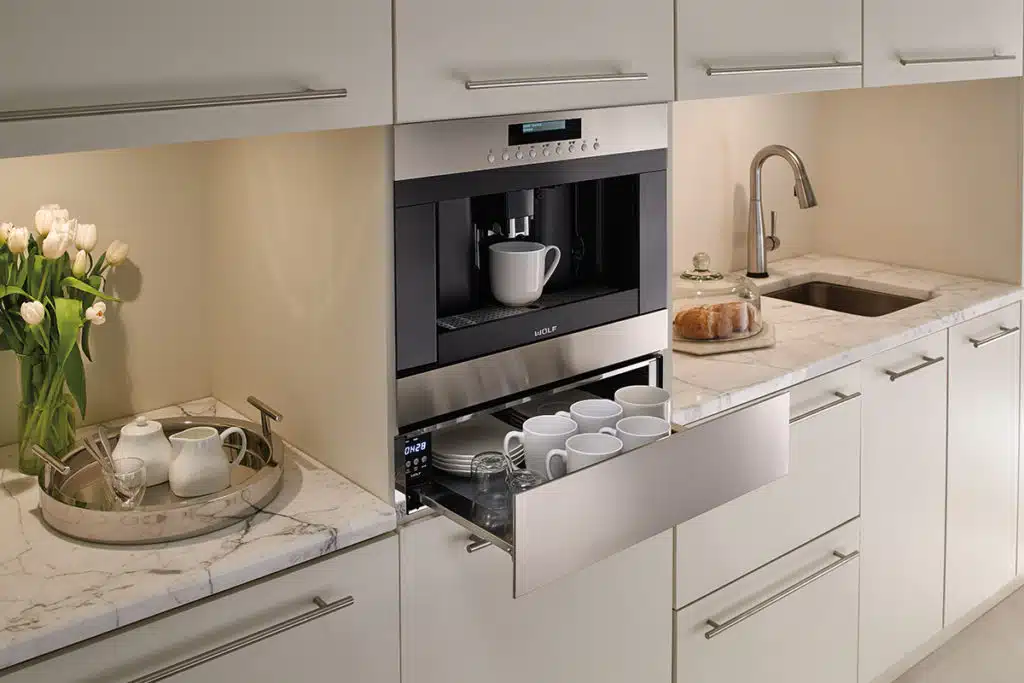
Built-in Features and Appliances
In kitchens and bathrooms, symbols stand for things that don’t move, including fixtures and big appliances. These are very important for figuring out how much counter space and functionality you have:
- Sinks: They are usually represented as rectangles with one or two circles inside them (the basins).
- Toilets (WC) are oval-shaped with a flat top and are attached to the wall.
- Tubs and showers are either big rectangles (tubs) or squares with a “X” (showers).
Appliances are sometimes only simple shapes, and they may also have short forms like DW (Dishwasher), REF (Refrigerator), OV (Oven), or WH (Water Heater). If an appliance is built in, such a hidden oven, it might be shown with dashed lines to show that it is below a counter or cabinet.
Pro-Tips: Picture Your Space
The first stage is to read the lines and symbols. The last step is to picture yourself living there.
Use the Legend and Shortcuts
Every professional plan should have a Legend (or Key) that shows all of the symbols and abbreviations that aren’t conventional. If you see “CL” (Closet), “KIT” (Kitchen), or “LIN” (Linen) and aren’t sure what they mean, always check the Legend again. Don’t ever assume.
See and Color-Code
To help you get from paper to real life, here are some professional tips:
- Pace it Out: Use the measurements (such 12′ x 14′) to figure out how big your current living room or backyard is.
- Follow the Flow: With your finger, follow the line from the kitchen to the dining room or from the master bedroom to the closet. Does the flow feel right and easy to follow?
- Sketch Furniture: Print out the layout and draw in your real furniture or outlines of it that are the right size. This will show you right away if your dining table is in the way of a door or if your couch is too lengthy for the wall.
Conclusion: Your Mastery of Blueprints
You now have the tools to see past the confused mess of a blueprint and understand exactly what your space may be. Reading a floor plan is no longer a secret skill; it’s something you can master that offers you complete control over one of the biggest expenditures you’ll ever make.
You are now ready to talk to architects, builders, and realtors with more authority than ever before. You know how to find the load-bearing wall and how to secure your future furniture by knowing which way the door swings. You will really learn your home’s layout and develop the life of comfort and clarity you’ve always desired if you start practicing today.
For more content like this CLICK HERE!!
Reference: